Preserving the fan is a cost-effective way to commemorate the hunt for years to come. Here are six steps to creating a grouse fan display.
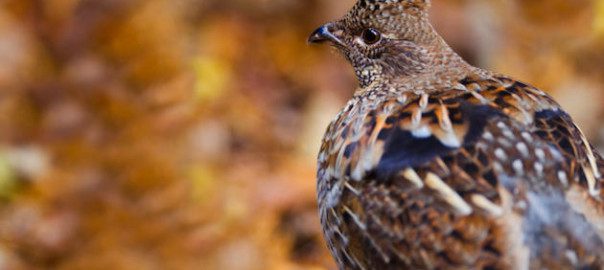
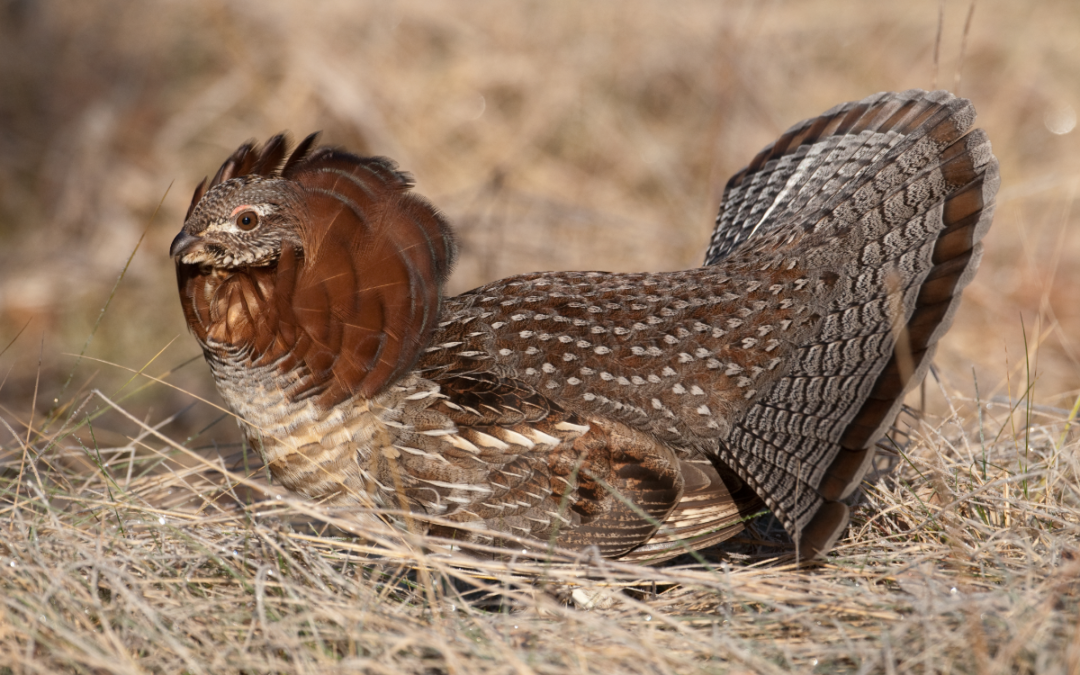
A ruffed grouse fan achieves the practical beauty that the woods demand. This barred rutter allows the bird to swerve through the thickest alders and away from most gun barrels. Now that you’ve been lucky enough to bag what most upland hunters consider North America’s premier game bird, preserving the fan is a cost-effective way to commemorate the hunt for years to come.
While most full-bird taxidermy jobs can run you north of 300 dollars, preserving your own fan will likely cost less than ten bucks.
You’ll Need:
- Knife
- Pins
- Cardboard or Styrofoam
- Salt or Borax (preservative)
- Flea or Tick Killer
6 Steps to Preserve Your Grouse Fan
1. Begin by isolating the tail feathers. The fan is not connected to the spine of the bird, but by a joint that is linked by ligaments to the spine. There will be primary and secondary feathers on the face and underside of the tail. Pluck those away until you have clear sight of the base of the fan. With a sharp knife, begin to make shallow incisions into the meat of the tail. As you move deeper into the muscle, you will be able to feel the groove of the joint. Cut through the ligaments and detach the fully intact fan. Trim excess muscle and tissue but leave enough that the feathers remain joined and malleable.
2. Cover all the flesh at the base of the tail with your preservative so no moisture is visible. Then pour a thin layer of your preservative on your cardboard or Styrofoam where the base of the fan will rest as it lays flat.
3. Using two or three pins, secure the base of the fan to the cardboard or Styrofoam. Once this focal point is concrete, begin pinning the last feathers on each end of the fan to shape the tail into full 180-degree display. You do not pin the actual feather but rather the base in between the quills. The tension of the muscle will make sure the fan retains its shape. Pin between other feathers as you see fit.
4. Once the fan is in its final position, pour your preservative over the base until all the muscle is completely concealed.
5. When you leave the tail to set in a cool, dry place for a month, apply flea or tick killer to remove insects such as mites that might begin to destroy the tail. This can be repeated weekly throughout the month.
6. Once the fan has dried for a month, shake the excess preservative off the base of the tail. The base can be covered (helps with display and possibly smell) in a range of ways: rawhide, shotgun caps, wooden dials, old coins, epoxy. Whatever way you’d like to shield the dried muscle of your fan can often be achieved by some superglue and a C clamp.
Each fan you preserve will remind you of the bird, the cover and meal that followed – all of these connected like the black band running along the rim of the fan.
 Shooting advice from a fellow bird hunter and professional shooting coach who explains why you miss and what you can do about it. Peter Blakeley’s revolutionary unit lead system for learning to shoot well has put more birds in many a hunter’s bag. His unique instruction helps simplify that elusive and key element of the successful bird hunter: forward allowance, or lead.
Successful shotgunning depends on creating accurate sight pictures of the birds. Wingshooting explores the three variables that determine each sight picture—the flight line of the bird, its speed, and the distance to the bird—to help you decipher the correct lead for each bird. Shop Now