Crafting your own exploding sporting clays makes for a fun and simple way for you and your family to make shooting season last all year long.
When our clay target exploded in a puff of orange smoke my oldest son turned to me and said, “Hey, wait a minute, what was that?” I chuckled to myself and I explained that I had made some homemade “no bake exploding clays” in the garage and slipped them into the thrower without him seeing me. I wish I could say I invented this smoking clay target “hack” but I actually stumbled across it on Youtube.
The clay target manufacturer, White Flyer, commercially produces “Orange Crusher” exploding clay targets that “smoke” or “puff” upon a successful shot. I saw some of these special clays a few years ago at a shooting demonstration put on by our local sporting goods retailer but I’ve never been able to find any to purchase. So, what is a good D.I.Y.’er to do but make your own?

This is an excellent way to involve youth in a fun craft activity. Form an assembly line and give each young person a task. Turn on some tunes, grab some snacks and turn a rainy afternoon into a fun family activity.
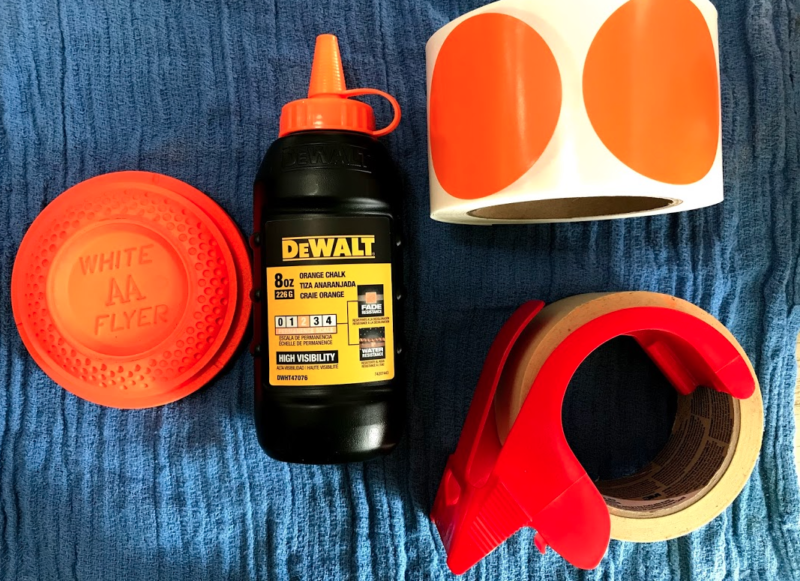
Ingredients
- Box of clay targets (biodegradable)
- Cost: $10-$15 per case of 135 clays.
- Container of orange chalk commonly used for a carpenter’s chalk line.
- Cost: $1.78 per 8 oz. bottle. I typically use about two bottles per case so you’re looking at about $0.03 per clay.
- To seal in the chalk use either:
- 5-inch round color labels. Orange is best but also white or another bright color. Search Amazon or eBay for the best prices and variety.
- Cost: $15.00 for 500 labels or $0.03 per clay.
- Wide masking tape. Either general purpose or contractor grade, 1 ⅞-inch wide.
- Cost: $3.98 for 60 yards or about a penny per clay.
- Shop rag or two
- 5-inch round color labels. Orange is best but also white or another bright color. Search Amazon or eBay for the best prices and variety.
Recipe
- Set out all ingredients on your work area. I’ve used both my garage workbench and the kitchen table. The key is to have a solid, flat working surface.
- Lay a shop rag on the table. This not only keeps your work area free of debris but it also provides some cushion on which to place the delicate clays.
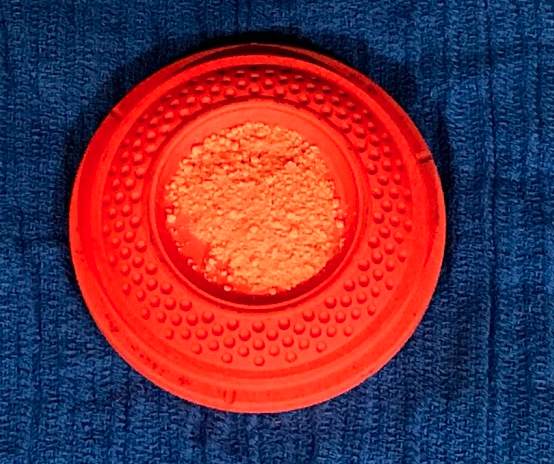
- Place a clay target on the work area so you can see the small, inner dome on the top.
- Squeeze some orange chalk into the small dome. Be careful not to add too much. A skinny tablespoon is about the right amount but err on the side of too little rather than too much.
- If you’re using 2.5-inch round labels, cover the dome of the clay target with a label. Press down around the edge of the dome to make sure it adheres firmly. Press around a second time to ensure a good seal.
- If you’re using masking tape, tear off two strips, each one approximately three inches long. Cover the dome of the clay target and press down around the edge of the dome to make sure it adheres firmly.
- Lather, rinse and repeat!
Why not kick your clay shooting sessions up a notch by dusting those clays in a puff of orange powder?
Chef’s Tips
After making a few hundred no bake exploding clays I’ve learned a few things that will help the first-time baker:
- Use the manufacturer’s 8-ounce container to apply the chalk. The spout helps apply the chalk in the right place without scattering orange dust everywhere.
- Avoid spreading orange chalk on the rim of the clay target because the masking tape or label will not adhere well. If you do get some chalk on the rim, gently wipe it off with a shop rag.
- Handle the clay targets carefully. They’re not as fragile as eggs but if you get butterfingers they will not survive a fall to your garage floor. Don’t ask how I know that…
- Store your finished clay targets in a semi-climate controlled environment. I store mine in a closet in my insulated garage, but a basement shelf or back porch would likely work just as well.
- Often the tape or sticker affixed to the clay target will prevent a missed target from breaking upon impact with the ground so it can be recovered and thrown a second time. This depends, of course, on whether your shooting range accommodates recovering unbroken targets.
I’ll be the first to admit that I could benefit from some off-season shooting practice. Okay, A LOT of practice. So why not kick your clay shooting sessions up a notch by dusting those clays in a puff of orange powder. Baking your own homemade exploding clays is a relatively inexpensive and simple home craft project. Get the whole family involved for some fun quality time then head out for some practice on the shotgun range. Even if you don’t put a few more roosters in your game bag you’ll surely find a great new off-season activity to keep hunting season going year round.
 More Shotguns & Shooting is a continuation and expansion of the material in volume one. It includes further insights and stories about fine guns and how they’re made, coupled with practical tips and advice for shotgunners. The subjects are wide ranging, allowing Michael McIntosh to capture the whole gun with unequaled insight and eloquence–whether he’s describing the painstaking work involved in transforming a blank of Old World walnut into a beautiful finished stock or the ways in which hands, eyes, and instinct combine in proper shooting technique. His erudite and approachable style makes reading this book like conversing with an old friend. Shop Now